Friday, December 2, 2016

Documentaries in Film Class


Our most recent project in Film was learning how to create a documentary. 

Documentaries were both easy and more challenging to create. The student ran into the challenges while researching the subject matter and following the documentary equation (Interviews spliced with event film, and B-Roll with the goal of teaching of persuading).

However it was easier, because if they followed the "equation", they would end up with a really great film. 

I will be writing an entry detailing the different types of documentaries, as well as a few tutorials, but until then, I have loaded a few examples of student work. 

I hope you enjoy. 


This video has a few bleeped out swear words, just so you are prepared. This is a Mockumentary set up in the "Intervention" style of episode.

Teaching color in Film

As teachers we can get so caught up in the technology of film that we forget to teach the aesthetics and art of filmmaking.

Color is a great story telling tool in Film, it can represent emotion a Person does not know that they are feeling and guide the viewer through the story.

As an educator I needed a little bit of a refresher coarse on color. The resources below helped me to better understand color theory in film. It's a little different than the good ol' 2D art styles.

Here is a wonderful video essay, that goes into detail about the use and purpose of color in film.


If you are not into showing videos in your classroom, and you want your students to have a reading assignment, here is a great free ebook that outlines color and gives examples of color combinations and their meanings.

https://www.studiobinder.com/blog/e-books/how-to-use-color-in-film-free-ebook/


Tuesday, November 29, 2016

Teaching Posing

Posing is very difficult for students to grasp right away, especially since they have so much experience with taking photos on their phones. It isn't that they think they know every thing already it is merely the fact that they have trained themselves in a certain way. They have trained themselves some bad habits.

Before we start, I want to make something very clear. Students do not protest a certain way of thinking because they think they know more than you, they protest a certain way of photography because they do know more than you. They are submerged in photography and self documentation, and they know a lot more about pop culture photography than we will, however they don't know the basic building blocks of aesthetics and composition, which is where they need you. But don't closed off to their suggestions, this is a rapidly growing field and they should be learning from each other.

Basic photography Things to know:

1. The 2/3 turn: Turning your model slightly so they aren't staring down a camera like a wild bull, is a great way to start your shoot. Also Talk to your models and encourage them. Do not order them around. Have a plan, but be kind.


2. Chin Down: Keep your models chin down, so it does not extend the length of the neck, making them look like a giraffe, also it will help make the contour of the face look better. Some people will say stick your chin out to get rid of wrinkles, but that can come back to bite you as well.


2.5. Fixing some misconceptions: Models often make the mistake of showing up, setting their jaw, plating their feet, and doing the sorority pose, which is silly.
- Relax the jaw, shift their weight and relax, don't let your model get into their Superhero serious pose.


3. Diagonal Lines: This just means don't stare at the camera like a dope. Notice the difference in the arm size just from putting your hand on your hip, and having good posture. This is probably the most important thing you will learn for taking photos.


4. Texture Lighting: When you are lighting, don't just shine the light right at them, angle it to the side or over head depending on the look you are going for.


5. Hands in a photo: Hands are quite difficult to pose in Photos. One technique I read about is called the "Ballet hands" It's where no matter how the hands are positioned in the photo, they are kept relaxed and with the fingers slightly apart, like a ballet dancer.


Here is an example of relaxed ballet hands in just an ordinary pose.

6. Footloose: Getting feet involved in Photography is like level 2 challenging, but it good to have student start trying early. They them try a jump pose, or a skip, or yoga poses to shake up the photoshoot.
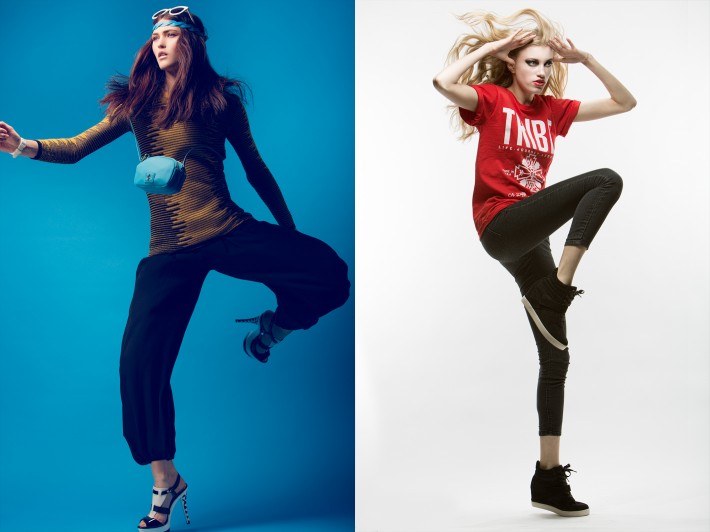


7. No Chimping: Chimping is a photogrphy term that refers to the act of looking at your camera after every shot. This very disruptive, and it slows down the shoot, not to mention you lose the energy you are trying to get the Models to show. Look at your screen after at least 10 shots, just to check the lighting and your settings, then get your eyeballs off that screen.


There are many many more technique out there but this is a good way to get your feet off the ground. 


Tuesday, November 22, 2016

Portraits!

In a world of the selfie, one would think students would be good to go with the whole take a picture of a person thing... Well thats where you would be wrong. It has proven very difficult to get good pictures from a large portion of my students and here is why.

In this article we will be talking about what I wished I had really drove home to may student before they went out to take pictures.

Here we go:
1. Don't use the flash. (The flash is not your friend. make sure they know how to control the camera enough to be able to figure out how to never have a flash happen)

2. Stay in Focus (I see blurry photos all the time, every time I give a photography project I get at least 5 kids who turn in photos that look like they were trying to capture images of Big foot. Remind them a blur photo is the equivalent of turning in a an art project that has been scribbled over)

3. The Candid is overrated (Students see the pictures on Pinterest of all these lovely wedding candids that are adorable, but they are also super hard to do correctly. So instead of getting great Candids, all you end up getting is a bunch of blurry out of focus pictures of kids with their faces in distorted positions)

4.  Have a nice long lesson about posing. (Teach them how to direct a model, and set up an photo area. Also have a participation project where they go out and try those skills, with only the goals being posing. Then bring them back together to critique what they did.)

5.  Loading pictures. This seems like an easy one. When students bring back the cameras make sure they load them on their computer right away, don't let them wait to do it. (If I had a dollar for every time a student told me they lost their photos because they weren't on the camera anymore, I would have a whole heck of a lot of Dollars)


Teaching Students To Use The Pen Tool!!

The pen tool is undoubtedly the single most frustrating tool in all of Illustrator. If you don't agree with this statement, then you are a freak who needs to be studied by scientists.

Once you master the pen tool yourself, it can be even more maddening to try to teach to students.

Here is slightly boring, but pretty helpful video about using the pen tool. You can use this to teach yourself, so you can have a clear instruction to demonstrate, or just show this to your class.


After that very helpful snoozville, here is a just plain relaxing, extremely satisfying Illustrator speed drawing. 


I hope you enjoyed this little entry, and found it helpful. In the future I will be presenting the student work from this project. 

Sunday, October 9, 2016

Fair use, Copyright, and the Hope Poster

So if you have any connection to YouTube s of late you will know that Copyright is a HOT topic right now. For those of you who are still getting into the online swing of things let me give you a little back story.

**Clears throat and takes deep breath** Youtube is finding that a lot of their users are not exactly acquiring all of their content legally. They may be using songs with out asking or without sighting, as well as just plain copying other big YouTubers in order to gain popularity. YouTube has tries to remedy this by allowing people to claim copyright infringement. The Video is then either taken down or they lose all their monetization until they can find out who should get the credit. Where the "Drama" comes in is where creators start illegitimately claiming copyright infringement.

This lesson is geared to talk about what my students are allowed to do, and how to stay legal in a world of Copyright issues.

Our Feature artist for this assignment is none other than the fabulous and ridiculous Shepard Fairey.
Shepard Fairey is the artist responsible for the very memorable "Hope" Poster. 
He is also the center of a large legal disagreement. You see the image he used was not his own. He had taken it from the internet. The picture was actually taken by Manny Garcia and belonged to the Associated press. Well when they saw the fame Shepard was getting from this image, and they recognized their picture, they were not to happy about it. They sued Shepard Fairey for copyright infringement. 

Shepard on the other hand claimed Fair use, which is where you can use an image for transformative proposes. Shepard was about to get away with it too until evidence came out, that he had hidden evidence proving he had known he was stealing the picture. 

Personally I think that he didn't steal the picture and that he never set out to take the credit away from someone else. I don't think he handled the situation well, but this whole issue is a big opinion war, so tell me your opinion in the comments below. 
The whole situation is a bit of a fluke, however it is important to know how to protect yourself. 

Our students got to make their own hope poster. They will not be selling them, which helps the copyright issue, also they are using images that are free to the public, as well as original images that are just being appropriated. 

Here is a tutorial from youtube to learn how to do it your self!


So checkout some of the great images below. 

For the King of the internet.


If you want to see get a lesson for something specific leave a comment below and don't forget to follow the blog!